Image Credit:
iskrinka74/iStock/GettyImages
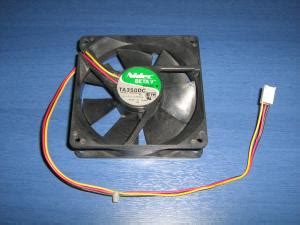
Computers and other electronics don’t deal well with water and heavy dust, but those aren’t hazards in most homes and offices. One hazard that’s a much bigger concern is heat because powerful CPUs and video cards generate a lot of it in the course of their normal operation. A laptop can sit on a cooling mat, but if you use a tower or desktop workstation, your best bet is to add more fans. They usually come in 3-wire and 4-wire versions, and you need to understand their color codes if you plan to install a fan yourself.
3-Pin Fan Connector

Running a low-voltage fan requires only two wires: one for the positive or “hot” lead and one for the negative or ground. A PC fan’s wire colors are pretty consistent, with red almost invariably marking the positive and black marking the negative or ground. The third wire varies depending on the manufacturer, but usually, it is blue or yellow. You don’t need it to make the fan turn, but the third wire is there for a good reason.
The Third Wire
If all you have on a fan is the two wires it needs electrically, then it can only be turned on or off. That means if it’s on, it’s running full blast all the time. That’s fine if you don’t care about the noise or the power consumption, but it’s wasteful. The third wire gives your computer a measure of control over that. It reports the speed of the fan back to the computer’s processors, which allows the motherboard to control the speed of the fan by raising the voltage – and speeding the fan – when the extra cooling is required, and lowering it when it’s not needed.
Installing a Fan
If you need to install a 3-wire computer fan, forget the wiring diagram. Most computer motherboards come with a standard connector for the fan, and it only fits one way. If the connector fits the pins, it’ll work, and you don’t have to worry about the pin arrangement. There are only a couple of circumstances when you might need to know the 3-pin fan pinout. One is if your computer has a proprietary, nonstandard fan connector. In that case, you might want to buy an adapter to make your fan work with that specific computer’s board. Alternatively, if you’re replacing or upgrading the existing fan, you can cut the connector from the old one and splice it to your new fan. As long as you match the wires color for color, you can solder them in place, and the new fan will work fine.
A 3-Wire Fan With a 4-Wire Connector
The other time you need to know how the wiring works in a three-pin fan connector is when you need to connect to a four-pin connection on the motherboard. A 4-pin fan uses its first three wires the same way a 3-pin fan does. The fourth wire connects to a circuit on the main board that’s used to control the fan with precision. Instead of simple “speed up” or “slow down” controls, the fan can be set to specific fan speeds as the CPU gets hotter. Usually, the main board is printed with the pin assignments for the 4-pin connector, so you don’t have to guess: the first pin is ground, the second is voltage, and the third is the control wire, so sliding the connector over the first three pins is uncomplicated.
Connecting to the Power Supply

If you don’t have enough fan connectors on the motherboard to provide the kind of cooling you need, you might also need to plug into the heavy 4-wire connectors that come from your power supply. You could theoretically do this yourself, but it’s easier to order a connector from your favorite computer parts vendor or directly from a fan manufacturer. These are often arranged as a pass-through connector, so the fan can be connected inline with a second device. Fans are low-power devices that leave plenty of juice for a disk drive or other accessory. It’s a practical way to conserve power connections and keep the maximum flexibility in how you configure your system.
Özel İçerikler Burada: Diğer Yazıları Kaçırmayın
