Apple’s MS-DOS FAT is just a different name for Microsoft’s FAT32 format.
Image Credit:
Westend61/Westend61/GettyImages
To format USB for Mac and Windows, there are two disk formats to choose from: exFAT and FAT32. The other formats – Microsoft’s NTFS and Apple’s Mac OS Extended – don’t work well on the other operating system. There are a few subtle differences between exFAT and FAT32, but most of these are only an issue if you are using a drive on a server.

For desktops using a USB drive, there are only two differences to be concerned about. FAT32 is the older version of FAT and can’t handle file sizes larger than 4GB. ExFAT is not compatible with computers older than Windows Vista or Mac OS X 10.6.5.
Formatting With Windows 10
Step 1: Open Windows Disk Management
To begin to format USB for Mac and PC on a Windows 10 computer, insert the USB drive into an open port and then launch the Windows Disk Management Utility. To find it, type “disk management” or “format disk” in Windows Search and select “Create and Format Hard Disk Partitions.”
Step 2: Select the Drive to Format
Select your USB drive in the Volume column. In most cases, this is the D: drive. If you have several drives, you can also tell which is the USB drive by its size in the Capacity column, or by launching File Explorer and looking at the name it uses in the left menu.
Step 3: Proceeding to Format the Drive
Click the “Action” menu and select “All Tasks.” Click “Format” in the drop-down menu to open the Format window.
Step 4: Select the Format to Use
Click the “File System” menu and select “ExFAT.” To use the USB drive on an old computer, select “FAT32.”
Step 5: Finish Formatting the Drive

Enter a name in the Volume menu; names help to distinguish the drive if you have more than one. Clear the “Quick Format” check box if you have sensitive information on the drive that you don’t want easily recovered. Anyone with a basic recovery program can pull erased data from a drive that was formatted using the Quick Format option, and unless you use a secure deletion utility, even standard formatting is vulnerable to later data recovery. Click “OK.”
Formatting with macOS Catalina
Step 1: Launch Disk Utility to Format USB for Mac and Windows
Insert the USB drive into an open port on your Mac computer. Launch Disk Utility, which is located in the Utilities sub-folder inside the Applications folder. Alternatively, press “Space-Command” and type “disk utility” in Spotlight Search.
Step 2: Choose the Drive to Format
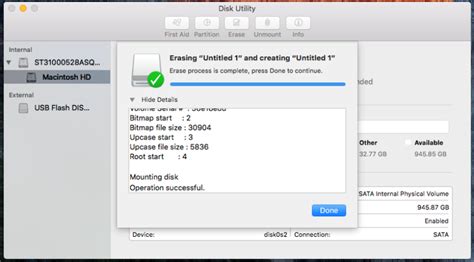
Select your USB drive in Disk Utility’s left menu. In OS X, you can identify the drive by its manufacturer and disk size. Click the “Erase” button.
Step 3: Choose the Format to Use
Click the “Format” menu and select “ExFAT.” If you plan to use the drive with an old computer, select “MS-DOS (FAT)” instead, which is Apple’s name for “FAT32.”
Step 4: Select the Erasure Method
Click the “Security Options” button if you don’t want to use a fast format. Drag the security slider from “Fastest” to “Most Secure.” As with a Windows Quick Format, data deleted with a fast erase may be recoverable by someone with basic file recovery software.
Enter a name to help you identify this USB drive from others and click “Erase.” Before removing the drive, click the “Eject” button beside the USB drive in Finder, or drag its icon from the desktop onto the “Eject” button in the Dock.
Özel İçerikler Burada: Diğer Yazıları Kaçırmayın
